
#
Introduction to the node editor
The node editor allows you to define the structure of the palletizing cell, setting the position of the various elements, as well as defining their operating parameters.
#
Preliminary considerations
For the correct use of this module, it is necessary to have a basic knowledge of the different types of palletizing lines, as well as the relevant parameters for their configuration.
Pay attention to details 🤔!
Check the parameters, a bad configuration can generate a malfunction of the installation. 🔥
#
User interface
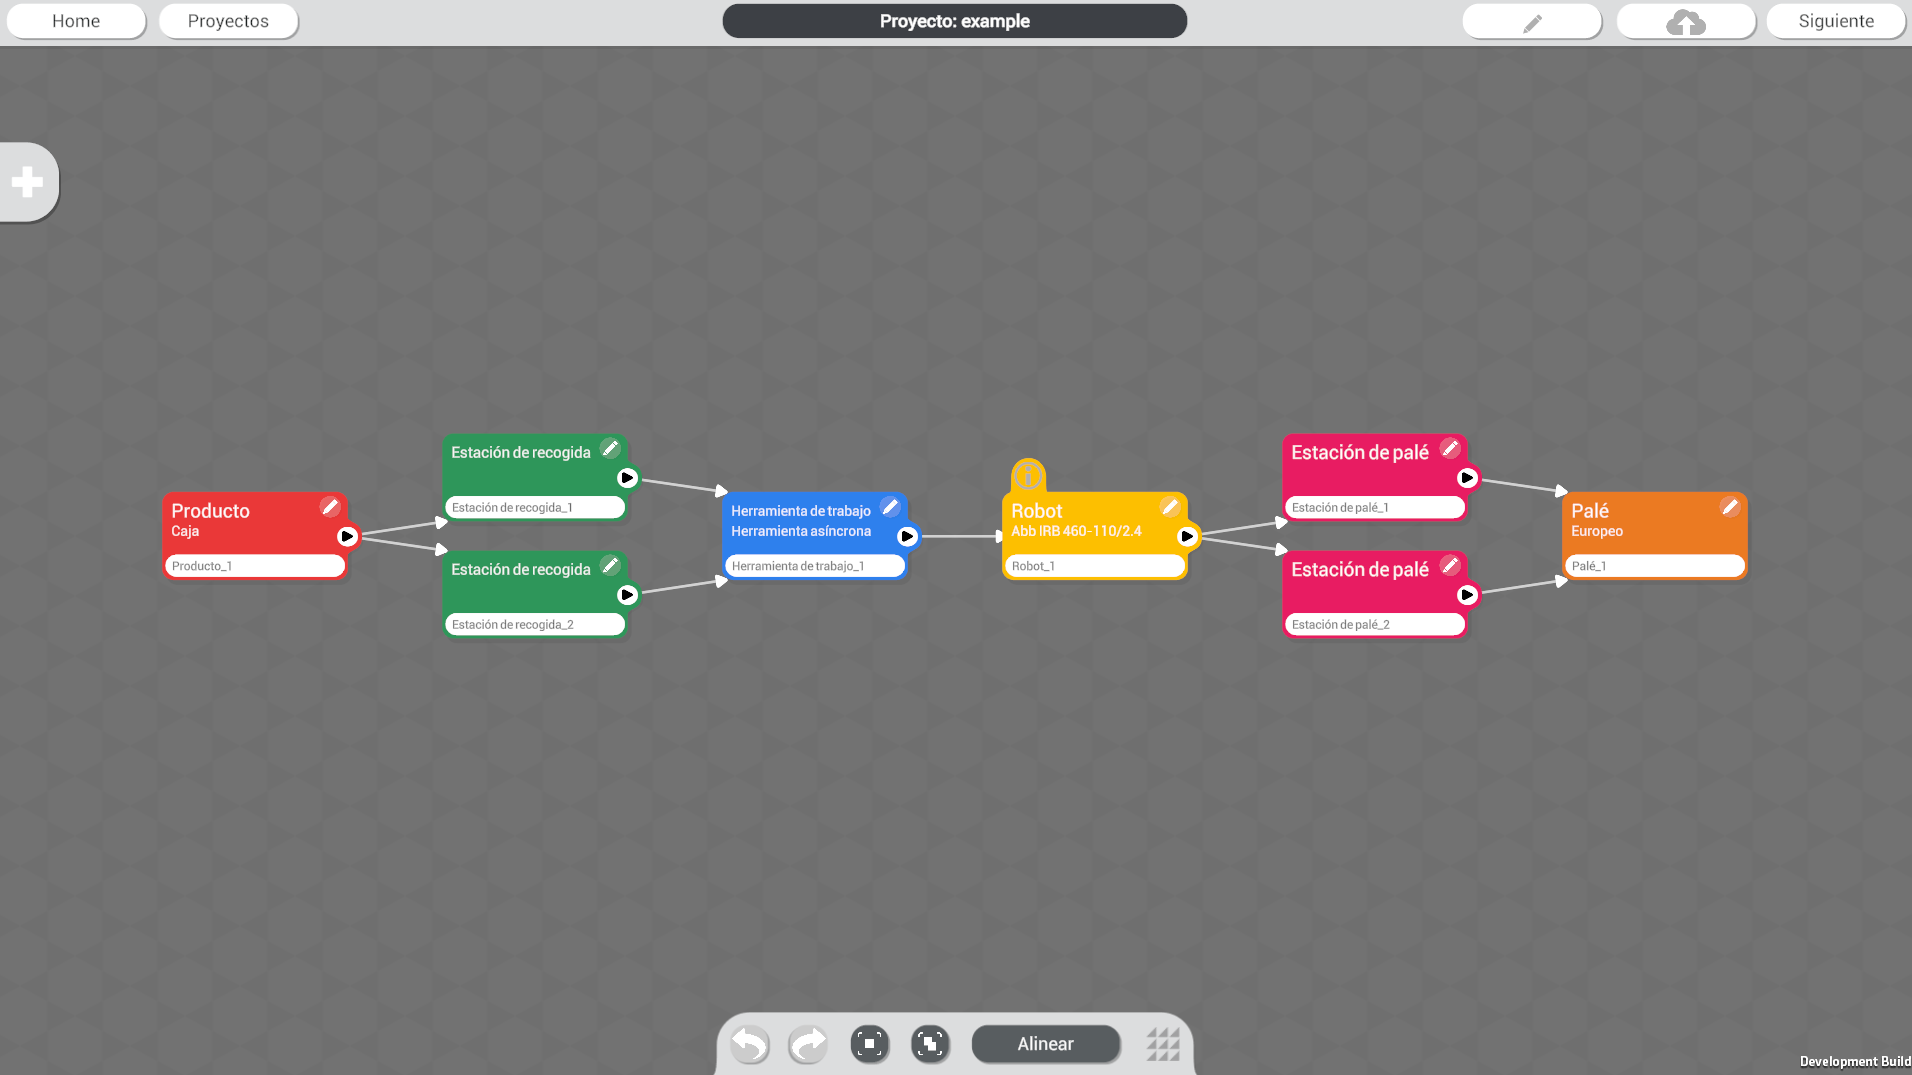
The node editor displays a work area on which to add/modify the nodes that represent the different elements that make up the cell you wish to program.
Mouse shortcuts

#
Nodes
For the configuration of a palletizing cell, in the Wepall software, it is necessary to design a node scheme. Each node will represent its equivalent physical element forming the installation.
And the connection between them, the interrelationship between the different elements.
First add, then configure
Before configuring any element, it is recommended to create the whole network of nodes and their links. Some nodes have parameters that depend on their links.
Create -> Connect -> Configure !
Each combination of elements linked by an arrow represents a recipe that can be associated with a mosaic.
Recipe 🍳
Each of the possible paths, will correspond to a recipe, and therefore a possible mosaic that can be designed. These recipes will be the different programs that will be loaded in the robot.
#
Elements of a node

#
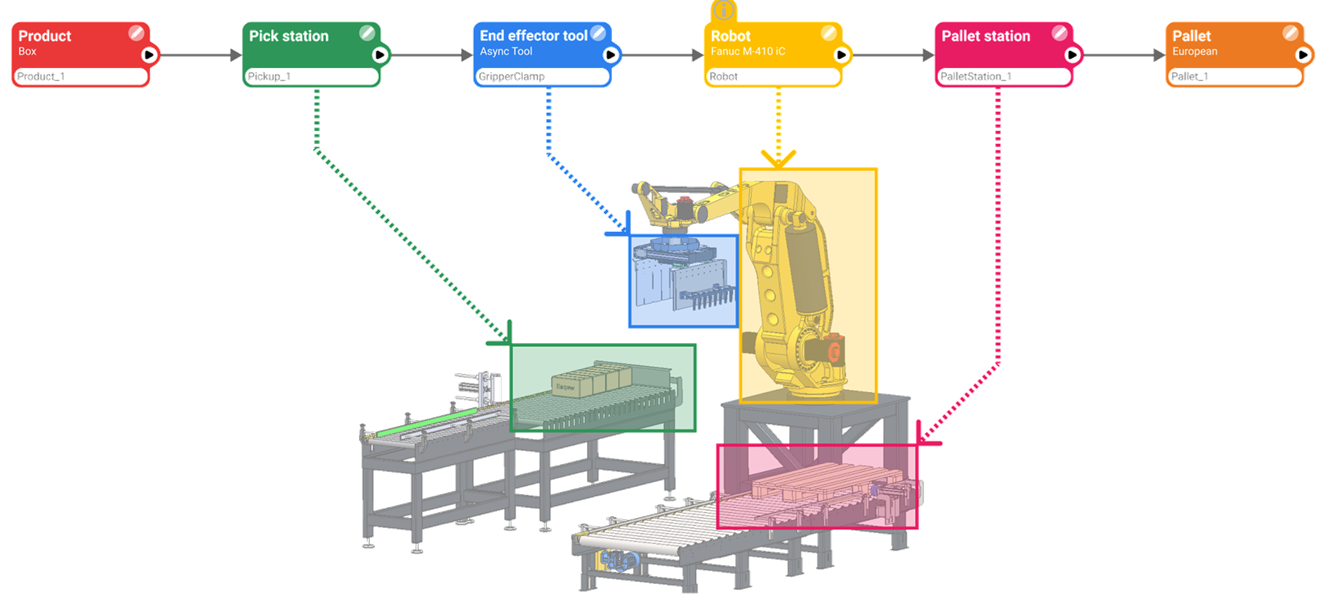
Equivalence of each palletizing element and its node
#
Add nodes
To add a node in the work area, click on the '+' button at the top left of the screen, a drop-down menu will open where you can select the type of node you want to add.
#
Connecting nodes
Once you have added the desired nodes, just click and drag from the right side of the node, represented by the arrowhead, and then drag to the node you want to link.
#
Node configuration
- Click on the pencil icon✏️. A menu of options will be displayed on the right side.
- Edit the block properties following the instructions in the Wepall manual.
- Do this for all the nodes in your schematic to get your palletizing line set up correctly.
Take attention! 👀
Again we remind you to take special care when entering the data for each node nodes, and always try to verify the data entered. Wrong data can lead to malfunctioning of the installation. 🔥